Yesterday, I attended the Choice webinar, “A Librarian’s Guide to Cybercrime Mitigation” and it was one of the more rewarding webinars I have attended. It reminded me of why we do the things we do when it comes to security. I would encourage any and all Library staff to watch the recording, found here:
They provided several tools that can help you yourself protect your digital footprint. From checking how secure your password might be to seeing if a website is malicious or not. Here are a few of the tools mentioned:
Please, secure your passwords; use a password manager; don’t re-use passwords; and above all else, don’t leave passwords laying around on sticky note! 😊
VUIT has recently implemented a policy that will expire/delete your Microsoft Team if it has zero activity for a full year. Never fear, all owners of the team are notified well in advance of the expiration and are given the chance to renew the team and keep it active. If this happens to a library team that you have ownership of (as a chair, group leader, director, etc.), LTDS will reach out and help you determine if the team is still needed, and where to go from there. If you have any questions, reach out via Inform!
Sometimes our browsers get clogged and cause issues, especially when trying to access sites that are behind protective layers. Then we have to tell users to go clear their browser’s history and cache. There is a way that this can be done automatically, though, when a user closes their browser. Please see below for how to do this based upon your preferred browser:
Click on the 3 dots on the top-right and select “Settings”
Click on “Privacy, search, and service”
Click on “Choose what to clear every time you close the browser”
Turn on at a minimum “Browsing history”, “Cookies and other site data”, “Cached images and files”
After this, you are done. There’s nothing else you need to change for Edge (and there is no “Save” button). You can now start using your browser as normal and when you close it, it will automatically clear your history & cache for you.
Firefox (Version 99.0 (64-bit))
At the top of the Firefox window, click the menu button on the right and then select Settings
Click on Privacy & Security
Look for the “Cookies and Site Data” section click the check box next to “Delete cookies and site data when FireFox is closed”
Scroll down to “History” section and change the drop down next to “Firefox will” from “Remember history” to “Use custom settings for history”. Then click the check box next to “Clear history when Firefox closes”
That’s it. Like Edge, there is no “OK” or “Save” button – it automatically saves your changes/updates so you can now use your browser as normal. And the next time you close it, it will automatically clear your history and cache for you.
Zoom Meeting vs. Zoom Webinar — how do you choose which platform is the best fit for your virtual gathering? Here are some questions to consider:
How many attendees are you expecting? Webinar can have up to 1000 attendees; meetings are capped at 300.
How much attendee interaction do you want? Webinars are more appropriate for one-way broadcasting to a large group. Attendees can’t un-mute and speak unless explicitly given permission individually by a host. Attendees also can’t see who else is there, i.e. there is no participant list visible to them. There are options on whether to enable chat or the Q&A feature for attendee interaction.
Do you need breakout rooms? Webinars can’t do breakout rooms — only meetings can.
Zoom provides a meeting and webinar comparison which might further help with your decision. LTDS is also available to talk you through each option. Submit an Inform to get in touch and/or if you decide to utilize the webinar option.
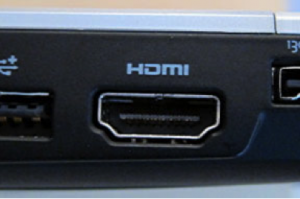
If you are anything like me, you’ve probably amassed quite the collection of cords for your various electronics over the years. What are they? What do they do? Let’s untangle this mess. Here’s a short guide.
HDMI: Audio and video signal, best for TV to PC connections.
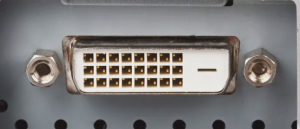
DVI: Video only, perfect for older systems or for 144Hz at 1080p.
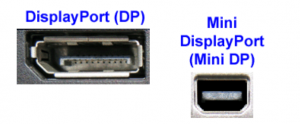
DisplayPort (DP) and Mini DisplayPort: The best connector for an audio and video signal, and can transmit 144Hz up to 4K.
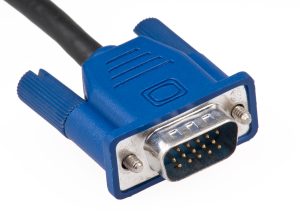
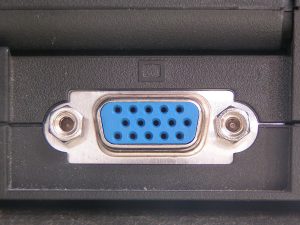
VGA: Old, legacy video connector. Only to be used when nothing else available.
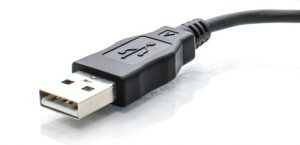
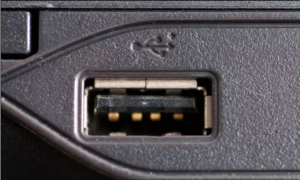
USB Type-A: The most standard connector for audio, video, data and power; but increasingly being replaced with USB Type-C.
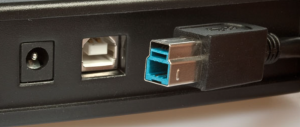
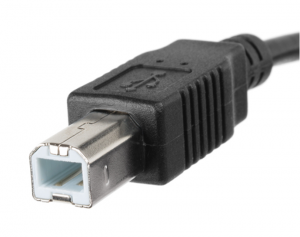
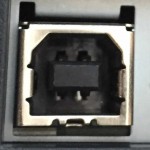
USB Type-B: An older, very rarely used connector. There were two different versions.
2.03.0
USB Type-C: Newest audio, video, data and power connector. The best connection for laptops and mobile devices.
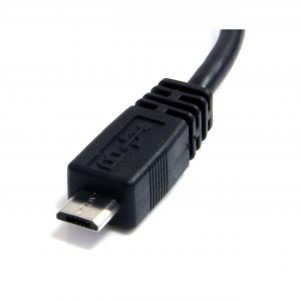
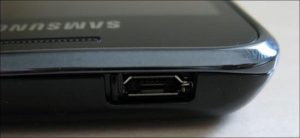
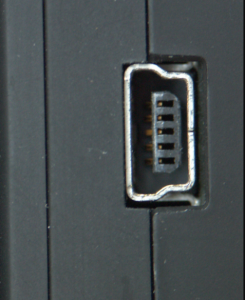
Micro USB: A miniaturized version of the USB interface developed for connecting older compact and mobile devices such as smartphones, Mp3 players, GPS devices, photo printers and digital cameras.
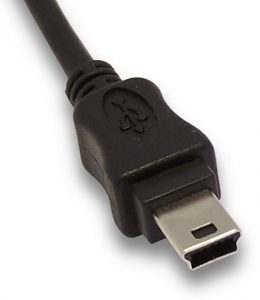
Mini USB: Another mostly outdated miniaturized version of the USB interface for compact and mobile devices.
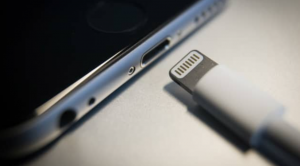
Lightning: Used to connect Apple mobile devices like iPhones, iPads, and iPods to host computers, external monitors, cameras, USB battery chargers, and other peripherals.
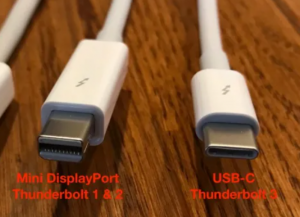
And here’s where it’s gets a little more tricky… Thunderbolt: Thunderbolt 1 and 2 use the same connector as Mini DisplayPort, whereas Thunderbolt 3 and 4 reuse the USB-C connector from USB. The main difference is there’s a thunderbolt on the head of the connector and the port, and in many cases, they can do everything Mini DisplayPort and USB-C can, except much faster.
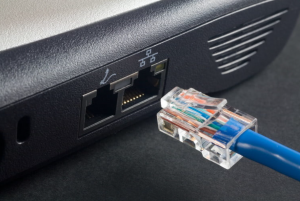
Bonus content! One last cord you should be familiar with.
Ethernet: This cable connects wired devices together to the local network for file sharing and/or Internet access.
And there you have it! A quick rundown of the big ball of cords under your desk.
Please feel free to contact LTDS if we can be of any additional assistance or would like some help with cord management.
There are times where you need to map a network drive, either because you have lost access somehow or you have been granted access to a network drive. To do this, please follow the below instructions (to do this, you either need to be on campus or on the VPN):
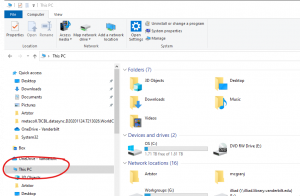
Click on the File Explorer icon in the toolbar:
If you do not have the File Explorer icon, in the box “Type here to search”, click inside the box and enter “File Explorer”. If you do not have either the File Explorer icon or the search box, you can search the Start Menu for File Explorer.
Then in the window that pops up, click on “This PC”. It may also be labeled “My Computer”:
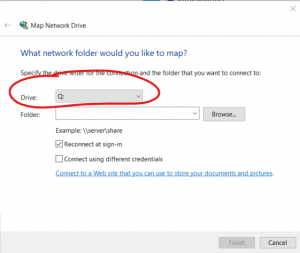
Then, in the top menu options, click the “Map network drives” button:
In the pop up windows that displays, change the Drive letter to whatever you want. For your personal drive, that will be N:. For the shared folders, that would be G:
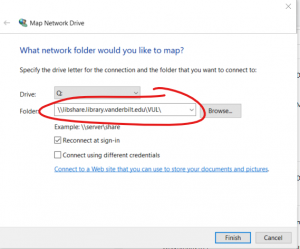
In the folder text box, enter the information you have received from LTDS. For the N: drive, that would be \\libshare.library.vanderbilt.edu\VUL\users\yourVUNetID and for the G: drive, that would be \\libshare.library.vanderbilt.edu\VUL\Workgroups. Any other network share would need to come from LTDS for the exact path.
Make sure the “Reconnect at sign-in” box is checked. This way you won’t have to remember to do this – it will automatically reconnect to the network share upon relogin.
Click “Finish”. If you are authorized to access that network folder, it will automatically pop up with the folders/files. If you have any trouble or issues with this, please submit an INFORM.
Did you know? Teams has made some improvements to the meetings interface, including:
Meetings open in a separate Teams window
Meeting controls are in a more convenient location
A new “large gallery” view is available so you can see up to 49 people at once
…and more!
But…for now, these improvements won’t be pushed to you automatically — you have to opt in to try them out. Steps to enabling the “new meeting experience” on your desktop client:
Select your profile pic at the top of the Teams app, then Settings > General. (General should be what’s showing when you open Settings, so you probably won’t have to select it.)
Select Turn on new meeting experience.
Restart Teams by doing the following:
Right-click or Cmd-click the Teams icon in the Windows task bar or Mac System Tray.
Select Quit.
Start Teams again like you normally would.
Check out more details in this post from Microsoft. As always, contact LTDS via Inform if you have any questions!
Sometimes our browsers get clogged and cause issues, especially when trying to access sites that are behind protective layers. Then we have to tell users to go clear their browser’s history and cache. There is a way that this can be done automatically, though, when a user closes their browser. Please see below for how to do this based upon your preferred browser:
Internet Explorer
Open IE browser
Click Tools > Internet Options > Advanced tab
Scroll down to the Security section and then check the box: Empty Temporary Internet Files folder when browser is closed
Click OK
Firefox
At the top of the Firefox window, click the Firefox button and then select Options
Select the Privacy panel
In the History section, set Firefox will: to Use custom settings for history
Select the check box for Clear history when Firefox closes
click the Settings… button. The Settings for Clearing History window will open
In the Settings for Clearing History window, click the check mark box next to Cache.
Click OK
Chrome
Open the Chrome browser
Open the Chrome Toolbar (3 lines to the right of the URL window) and then select Settings
Select Show advanced settings…
Click the Content Settings button located under the Privacy section
Under first section labeled Cookies, select Keep local data only until you quit your browser
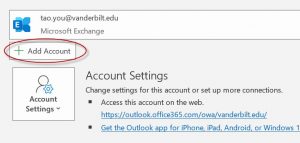
1. In your Outlook, click “File” menu, then “Add Account”.
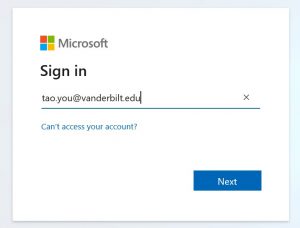
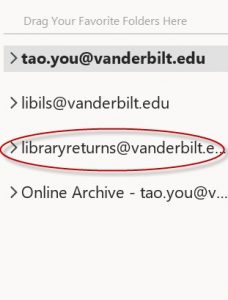
2. The Account setup window pops up, type in the SEM email address, in this case libraryreturns@vanderbilt.edu, click “Connect”.
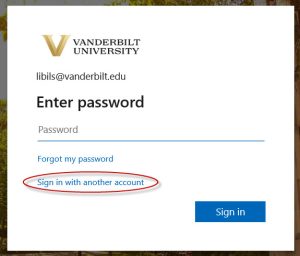
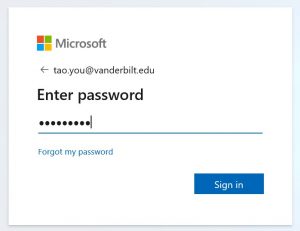
3. If prompted, choose “Office 365” option, then in the next screen, choose “Sign in with another account” option, type in your Vanderbilt email address and your epassword, here I used my Vanderbilt email as an example.
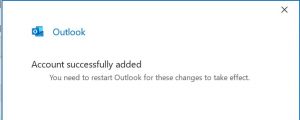
4. Once you see the following screen, your account is set up correctly. Log out your outlook, log back in, the system will start to load emails from the new account, it may take a while.
5. Log out your outlook, log back in, now you should see the SEM mailbox added to your account.
Troubleshooting tips:
Make sure you know the exact email address for the SEM mailbox.
Make sure you VU email account has been given access right to the SEM mailbox. (check to see whether you can access the SEM mailbox via the web).
If you are still having issues, submit an INFORM, or come to the Friday LTDS office hour.
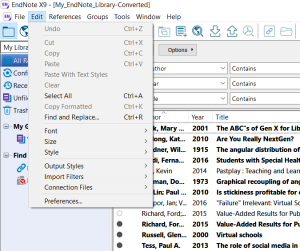
EndNote is a popular piece of software that is used by many members of the Vanderbilt Community. First and foremost, the most efficient way to find the full-text of an article is through starting at http://www.library.vanderbilt.edu/, but if you want to try the following options, it may save you a little bit of time, but the first thing you need to do is to make a couple of changes to your Preferences. When you are in the EndNote client, go to Edit -> Preferences:
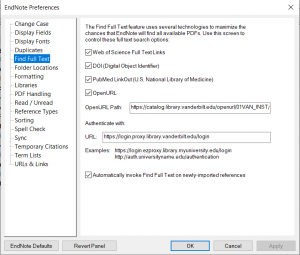
You can also select the “Automatically invoke Find Full Text on newly-imported references”.
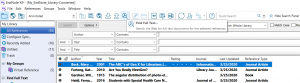
Then click “Apply” and OK. There are two ways from within EndNote to potentially find full text. The first utilizes the “Find Full Text” feature within EndNote.
This option will try to locate full text of the articles selected. You will be prompted to Authenticate with your VUNet ID/epassword and if it is successful, there will be paperclip next to the Author.
NOTE: Based on our experience, this is rarely reliable. If you are not successful, try option #2:
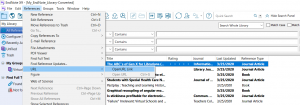
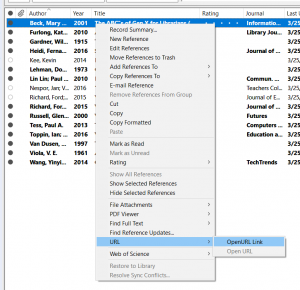
Here, we will utilize the OpenURL option. There are a couple of ways to get to it. First, make sure the article you want to find is selected, then go to References -> URL -> OpenURL Link:
The 2nd method is to right-click on the article
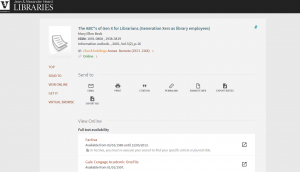
This will take you directly to the Vanderbilt Library’s catalog where you can then access the full text if it is available.
This is just a couple of ways that you can utilize EndNote. If you have any questions, feel free to contact us.

 3.0
3.0