Mapping drives

There are times where you need to map a network drive, either because you have lost access somehow or you have been granted access to a network drive. To do this, please follow the below instructions (to do this, you either need to be on campus or on the VPN):

Click on the File Explorer icon in the toolbar:

If you do not have the File Explorer icon, in the box “Type here to search”, click inside the box and enter “File Explorer”. If you do not have either the File Explorer icon or the search box, you can search the Start Menu for File Explorer.

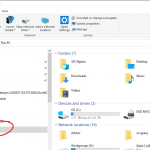
Then in the window that pops up, click on “This PC”. It may also be labeled “My Computer”:


Then, in the top menu options, click the “Map network drives” button:

In the pop up windows that displays, change the Drive letter to whatever you want. For your personal drive, that will be N:. For the shared folders, that would be G:

In the folder text box, enter the information you have received from LTDS. For the N: drive, that would be \\libshare.library.vanderbilt.edu\VUL\users\yourVUNetID and for the G: drive, that would be \\libshare.library.vanderbilt.edu\VUL\Workgroups. Any other network share would need to come from LTDS for the exact path.

Make sure the “Reconnect at sign-in” box is checked. This way you won’t have to remember to do this – it will automatically reconnect to the network share upon relogin.

Click “Finish”. If you are authorized to access that network folder, it will automatically pop up with the folders/files. If you have any trouble or issues with this, please submit an INFORM.